7 Jun 2026 · how to
Automate variable creations in Figma
Me (Alex) and Yanka have tested a new workflow for quickly setting up Figma variables. A process that is usually quite time-consuming and often frustrating. This post goes through an LLM-enhanced workflow to quickly set up Figma for success.
It will also handle the naming of all variables and placing them into semantic groups. It will generate all primitives like color-gray-100 and semantics like semantic/color/surface-2 for example.
Step 1: The tools you will need
Figma. Any Figma plan can be used to achieve the steps in this guide. A paid one however will allow you to set up theme variables.
Tokens Studio for Figma, a plugin is our plugin of choice, though there are other importer plugins you can look into. A caveat: the ‘docs’ prompt context below will have to be created for the tool of your choice.
AI tool like Claude Code, Codex, Copilot CLI etc. Anything that can generate content for you. In our testing, we used Copilot CLI with Claude 4.7, though any model, including free web-chat based ones should handle this task.
Step 2: Context
This is an important step. To get the correct result, your AI tool must have the needed context, that is, what kind of code do we need to feed into the Tokens Studio plugin to get a working design system imported into Figma correctly.
Use this documentation file to feed in your LLM.
Here is how it was generated:
- Find the plugin’s documentation site.
- Quickly check for where the JSON file or token structure is.
- Grab a link and prompt the LLM:
Open https://docs.tokens.studio/manage-tokens/token-types/ and locate any relevant content. Analyze carefully the exact
JSONstructure the plugin takes. Document everything in a way that an LLM can generate validJSONgiven user prompt.
The resulting content does not need to be generated again unless there is a plugin update or you decide to use a new plugin.
Step 3: Describe your design system in detail
This is the most time-consuming task. Here, you want to detail the exact design system you want to generate. Be specific. Here is an example of the language:
- H1 - 64px, 110% lh, bold. Scale down to h6 at 14px evenly.
- body text from sm to xl - 12, 14, 16, 18, 20px.
- Primary color: #DF2935 at 500
- Secondary color: #DF2935 at 500
- Generate full primitives for primary and secondary from 100 to 900
- Generate gray (neutral) from 100 to 900 + white and black
- Build all primitive vars, use them for semantic ones
- Font: Google Sans
- Body BG: gray-100, surface: white, text: gray-900, muted text - gray-700
It is not super detailed, but it gets the idea across. The more work you put here, the better the outcome.
Then, we append some more text to our prompt:
If I have missed important data or it contradicts itself, ask questions before generating the
JSON.Fill in gaps when I give you “from 100 to 900” with equal steps.
When I say “primary at 500” I mean the scale 100-900 to be created by you where I only give you one color at the 500 step.
If I give colors that lack contrast like “muted-500” not working on background,
Out of this, the LLM will generate a lengthy JSON file or at least JSON-formatted text you can copy. Depending on your setup, this would be a file to track on your system or just request a new text every time you prompt it. The difference comes to what you use.
Let’s say you use “Gemini” or “ChatGPT” in the browser. If so, you would get text to copy. If, however, you use a desktop app that has access to your file system like “Claude Code”, then you can point it in which directory to use and it will output a file like tokens.json there, which you can open with any text editing app and copy. Feel free to reach out if this is a difference / concept you want to read more about and we can write some new posts related to it.
Run the prompt.
Its output will be a long JSON file. Here is a link to ours if you want to compare, though do not worry if you don’t understand how it works and what it does. In its most basic form it’s just a set of rigid instructions for a program to read what values you want and how they should be named.
This request is what generated the MD file we linked to above. It takes a bit more work, so if you’re going to use the same plugin, just use the file we shared. How to do so, explained below.
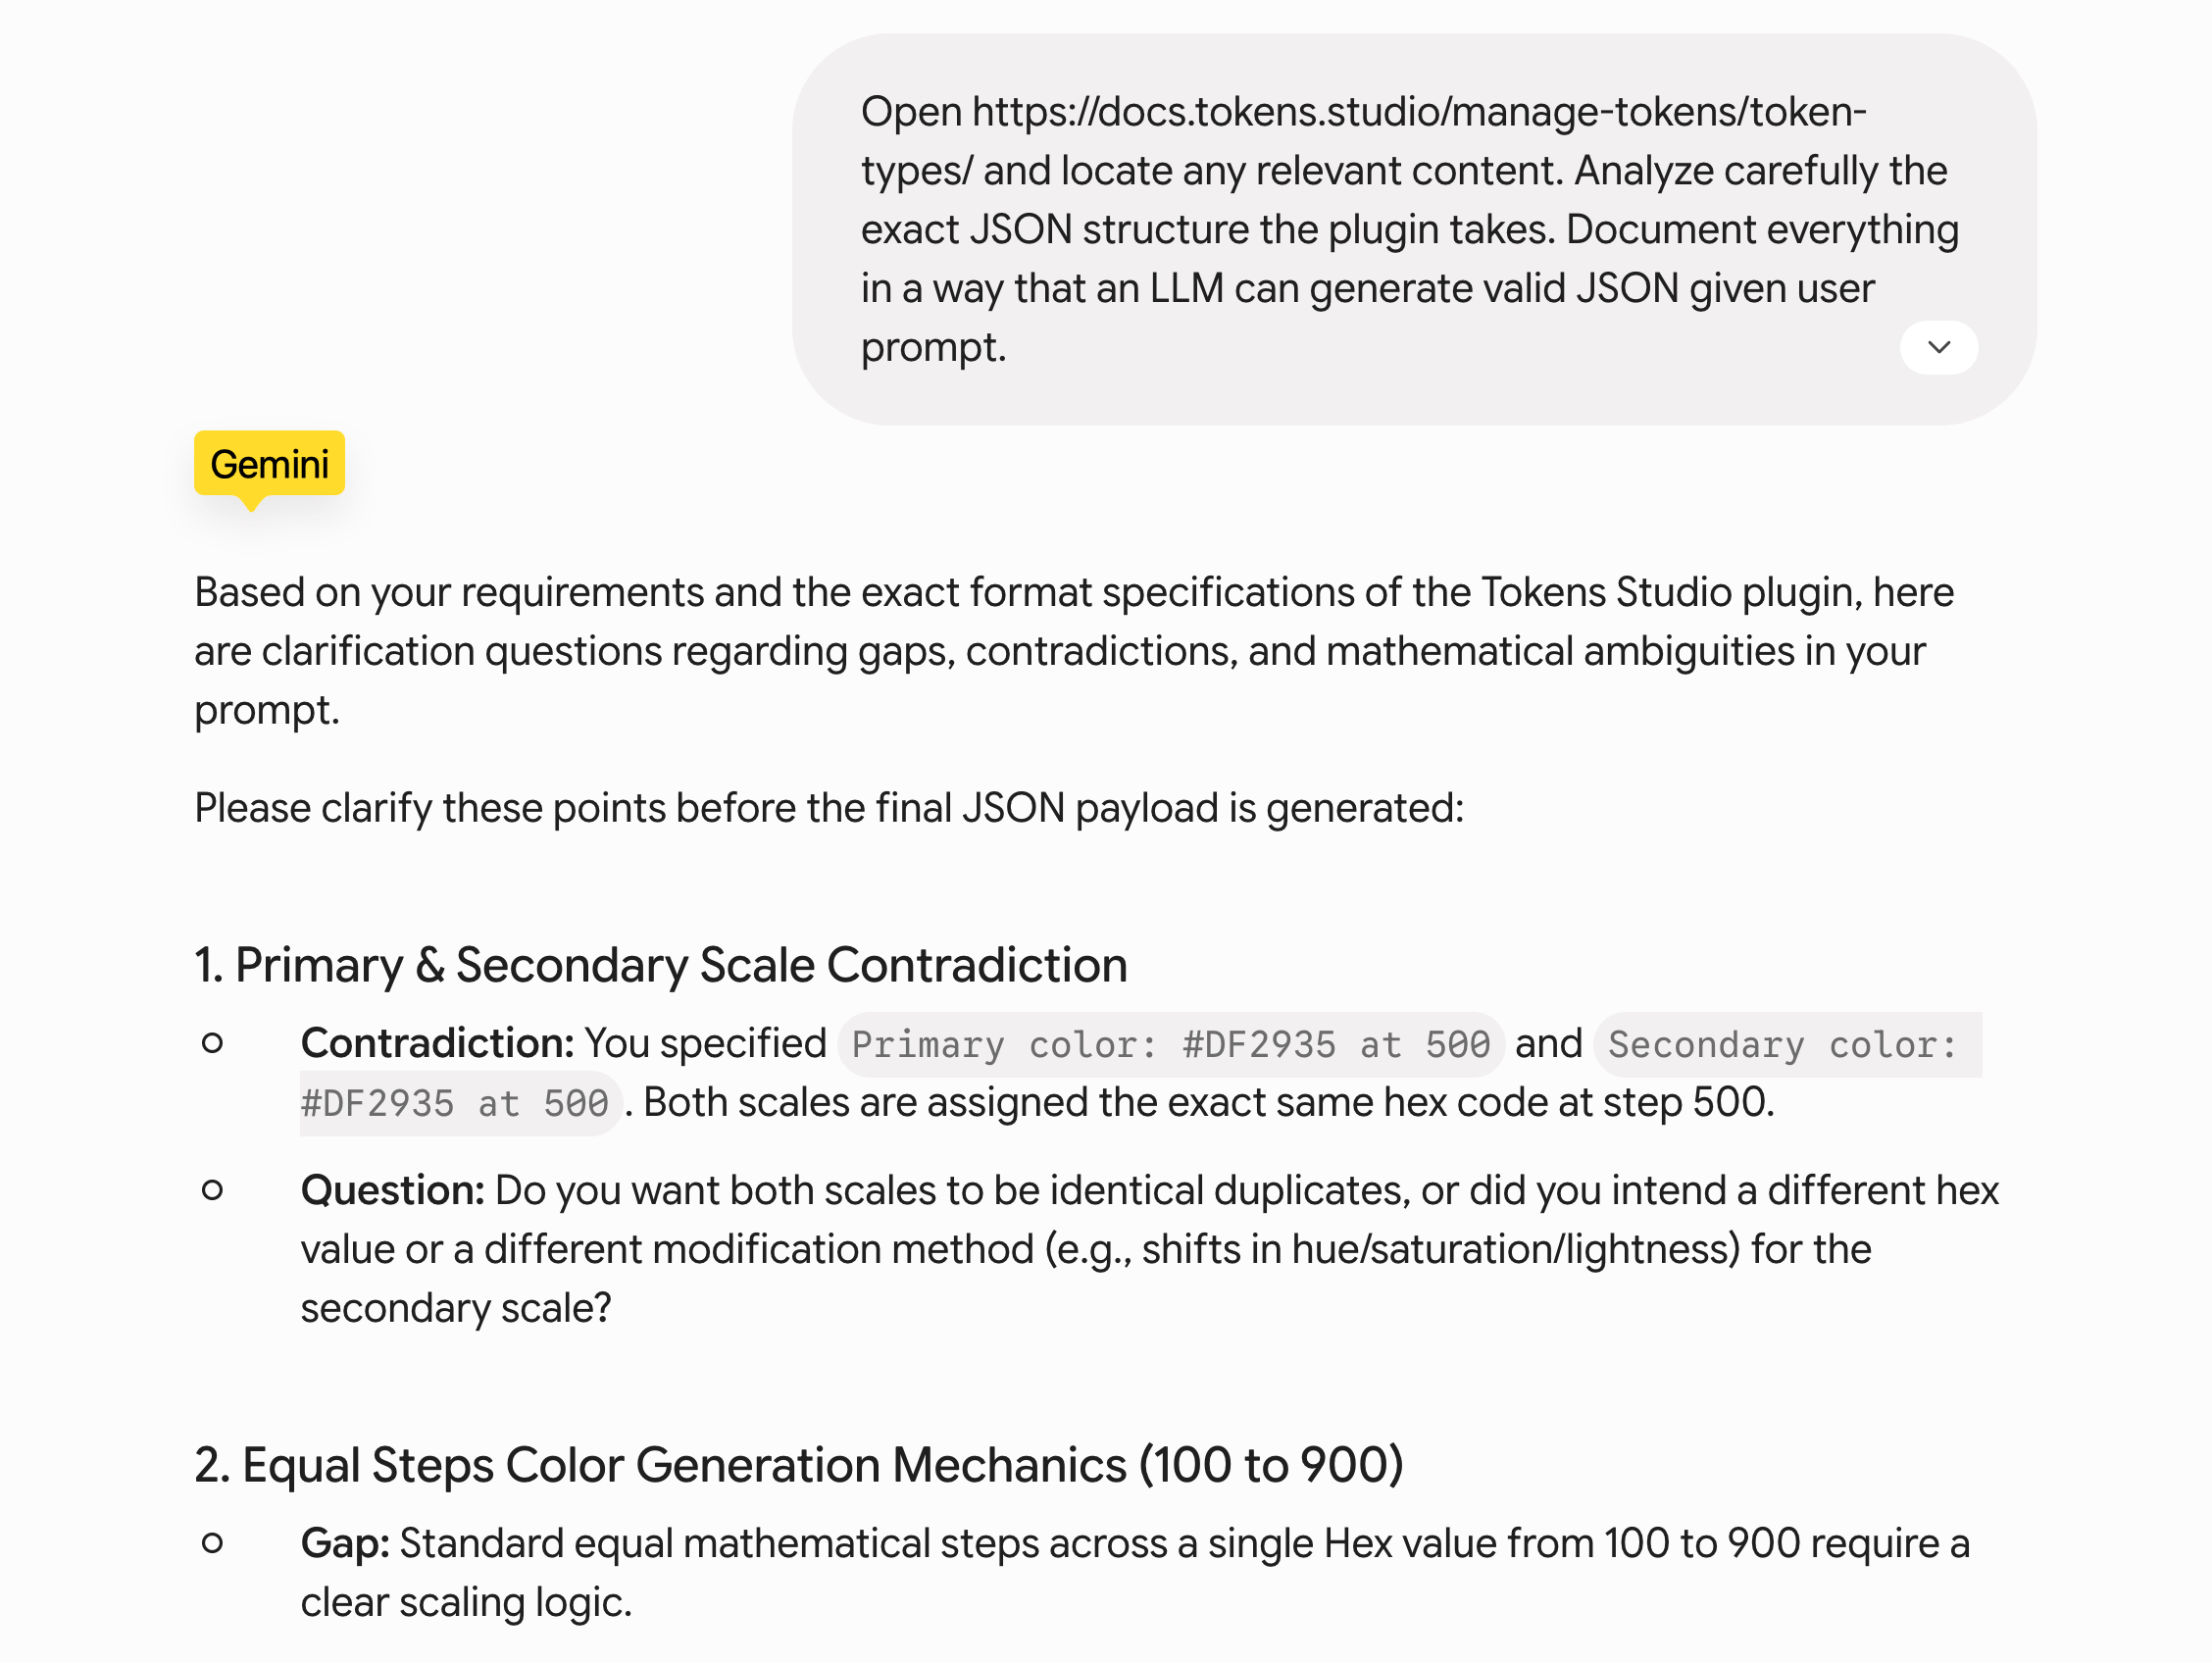
As you can see, Gemini quickly found a mistake in our prompt - we gave it the same HEX colors for primary and secondary. This is good! This is what we want - for it to catch mistakes. We will give it answers to all questions and show you the final JSON file:
prompt.json - you can copy the content between and including { } or generate your own.
The final flow - JSON -> FIGMA
Here is the final step - we will move the JSON file (code) into the Figma plugin, which in turn will move it to Figma itself for you to use.
The plugin’s documentation is at docs.tokens.studio if you want to read more.
Then, once it’s active, and you’ve clicked “next” some 10 times, you will see its standard interface, in which a blue button “New file” shows up. Click and see the edit interface:
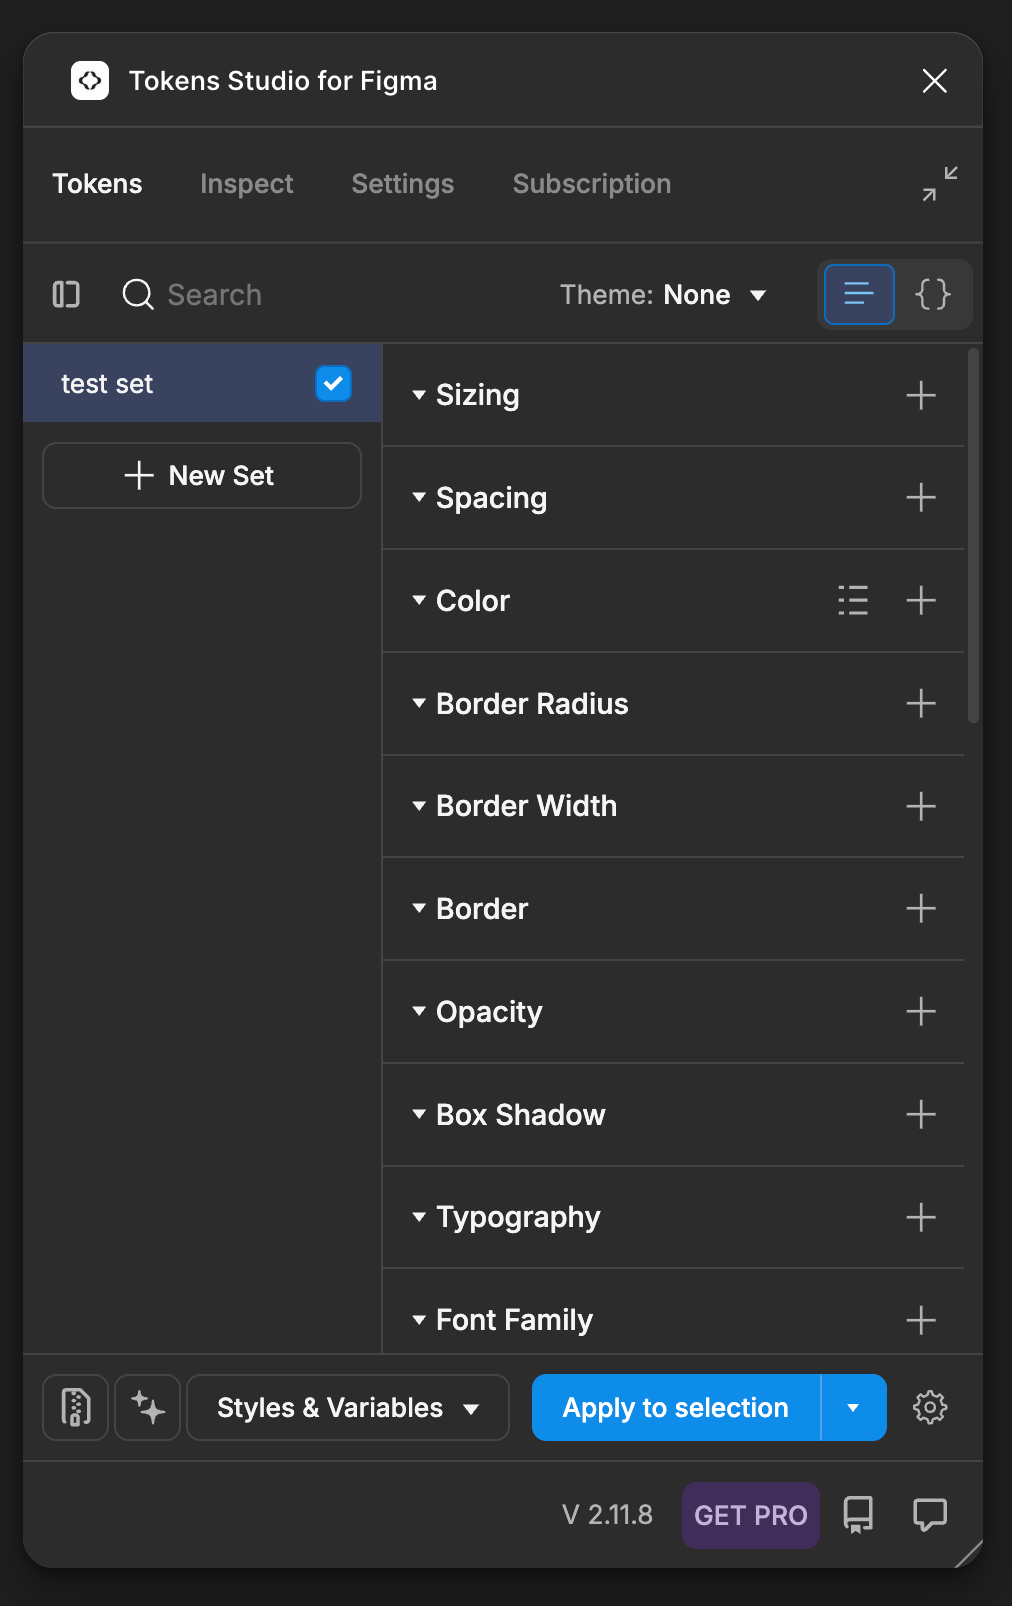
You could work on it and make edits with it, but for this guide, we don’t have to. All we need is the import to Figma option. Let’s do that:
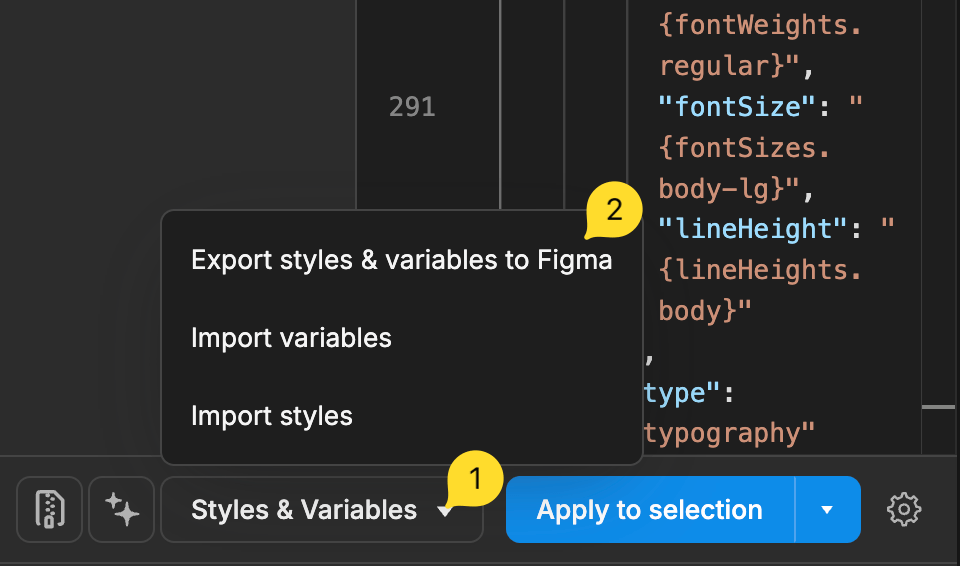
See the {} icon on the upper right side of the interface:
This is where we plan to place our JSON code. Now, let’s get back to the LLM’s output. Now is the time to copy-paste your JSON content or our test one from above into the input area. Just make sure to remove the existing {} characters. They indicate an empty configuration, nothing between them.
The next window:
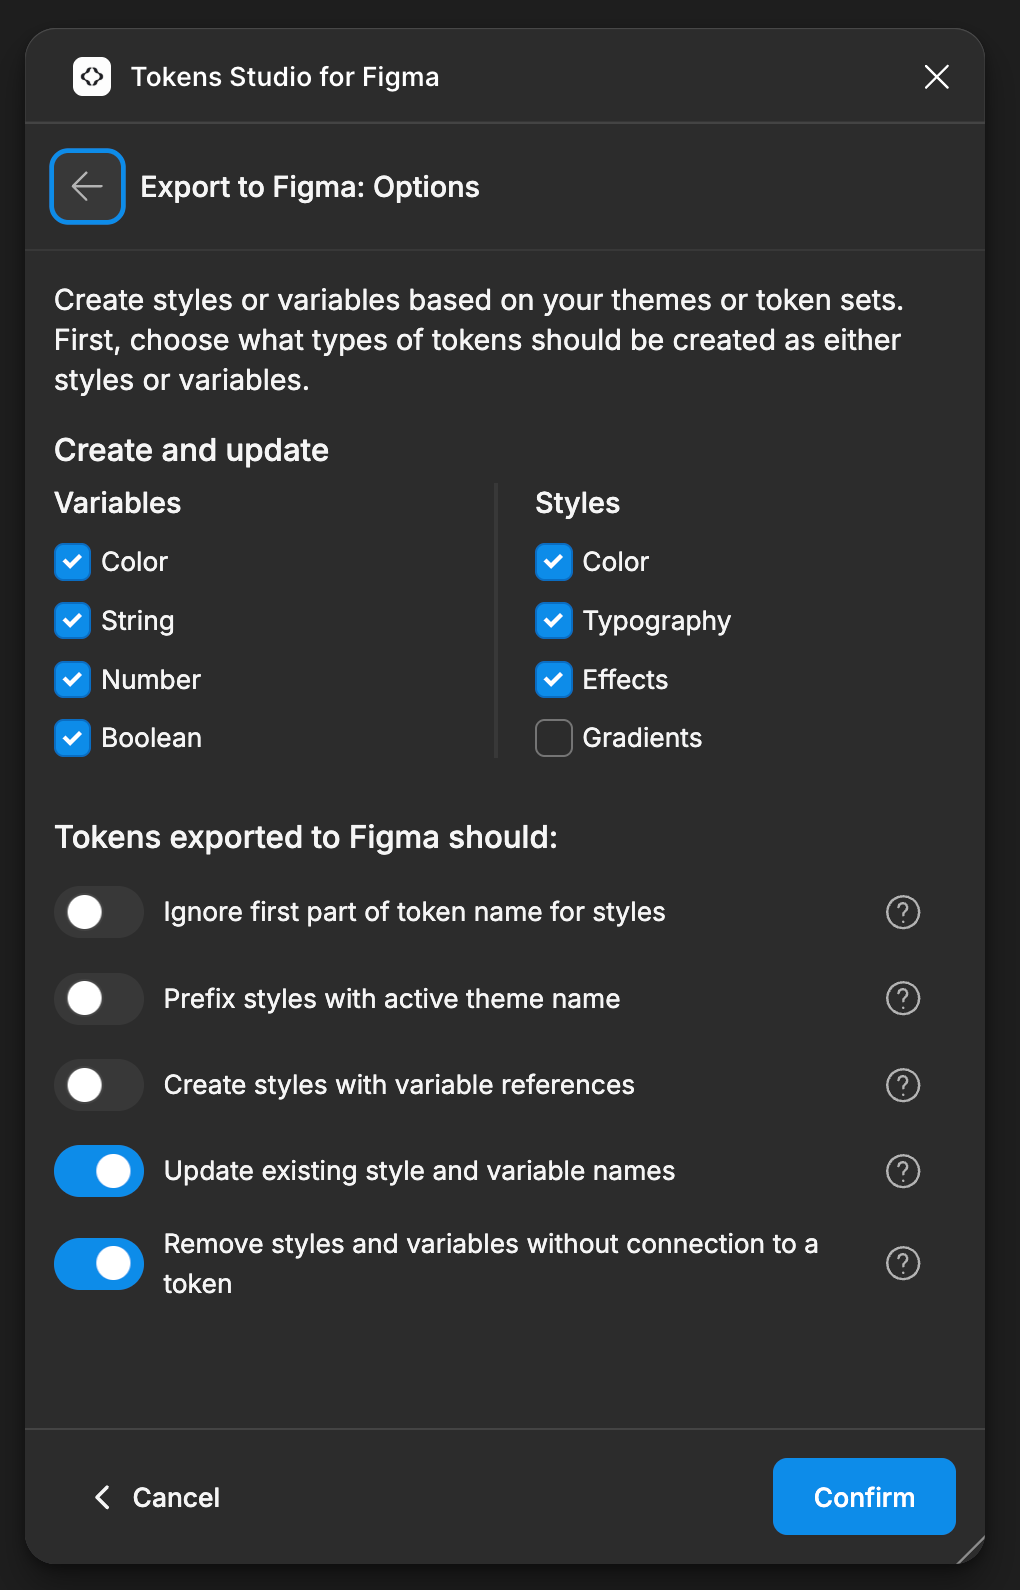
It gives multiple options and settings. We suggest you check them carefully and apply what you actually need. For example, in our initial go, we just import everything into Figma, but if we need to overwrite later, we will want the last toggle also ON.
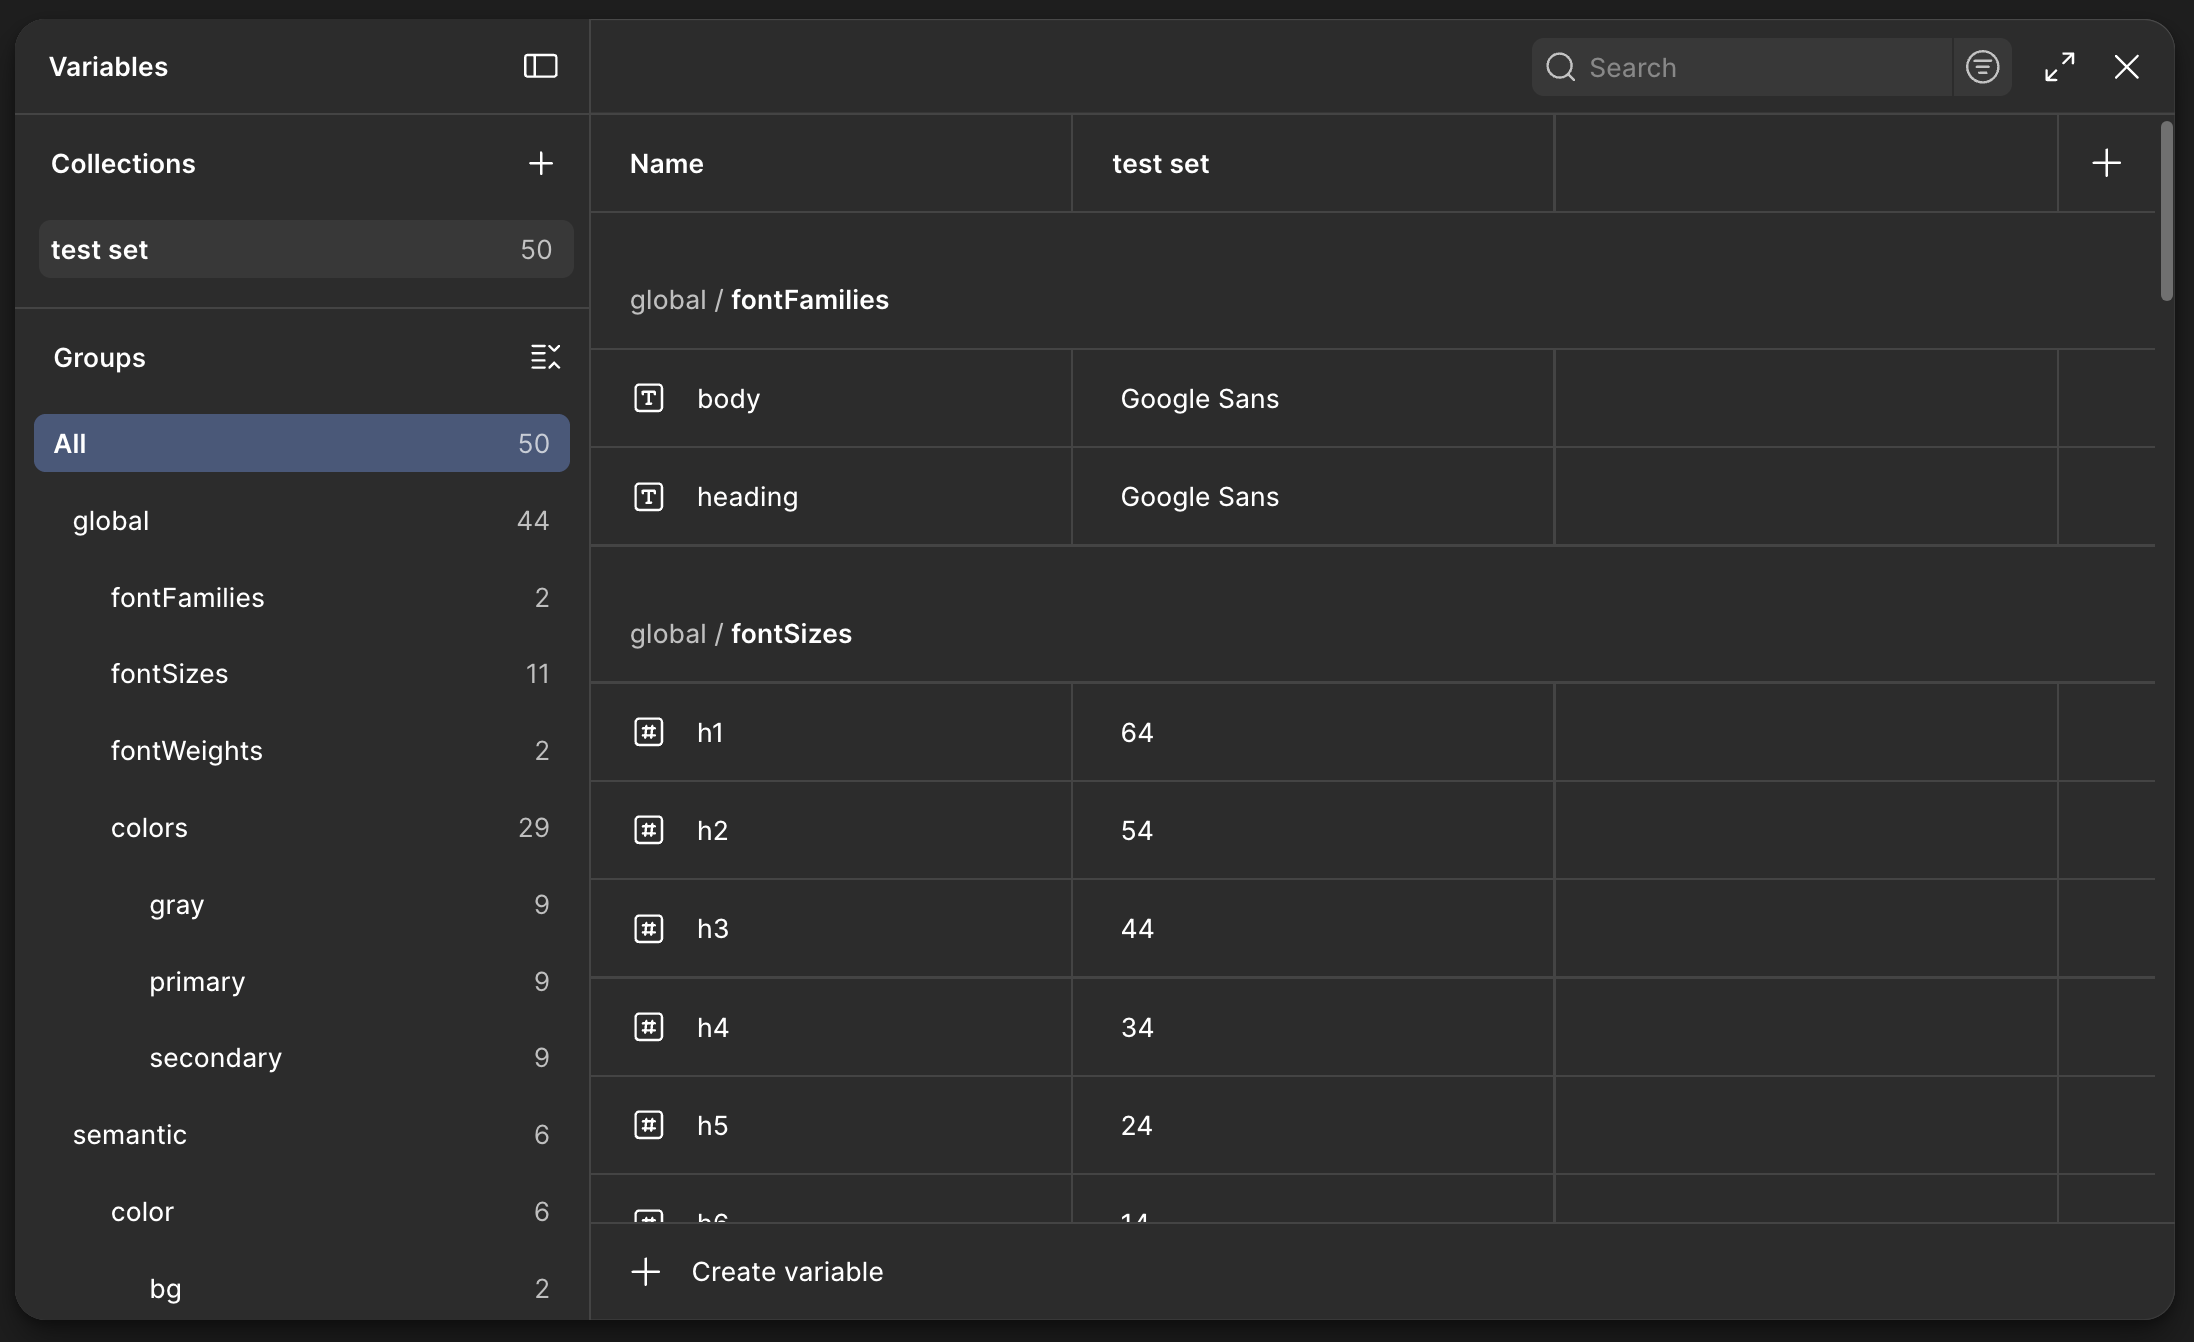
Finally, export to Figma. The plugin will import everything into its Variables section:
This is it! Onwards, you can repeat the same flow, this time working on top of your JSON file so the LLM will know to make edits to it, not generate a brand new one. Just feed it to its context by copy-pasting or providing it as a file.
Connect with us on LinkedIn: